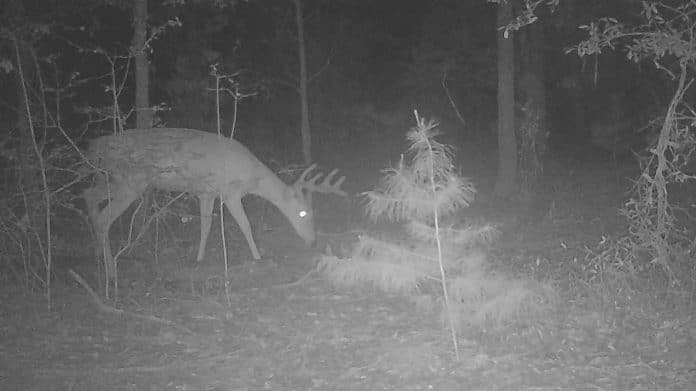
From time to time I use electronic game cameras to assist in my scouting. These last few years, I’ve really captured some amazing photos on my game cameras and I thought I’d share a few tips to help you capture the best images you can on your own. But, before I do, I want to suggest that a good trail-camera is no replacement for basic woodsmanship. Learning to read signs properly can give you the same information as the camera. The only advantage the camera has for me has been to provide some really cool before and after images of the bucks while they’re still in velvet for comparison to when the antlers harden.
Location
Let’s face it, you will not get pictures of deer if there aren’t any deer around. Just like hunting, you want to pick a location that deer are frequenting at that given time of the year. Check on water holes now in the heat of the Summer, field entrances to cut hay fields or the upwind side of a timbered ridge where deer will bed down to take advantage of the breeze. Find the sign.
Direction
Make sure your camera is not facing directly into the sunrise or sunset. Many times we forget this simple step and get blurred or whited-out photos from the sun’s glare, so try to avoid facing the shutter due east or west. Also, if placing a camera on a trail, orient it at a 45-degree angle to the trail instead of head-on. This will give your trail-camera wider viewing and more potential to trigger and catch a deer in the frame as it moves along.
Height
Get those cameras up! When setting up a trail-camera, I believe you should always make sure the camera is at least as high as your head. I think deer are much less likely to notice cameras placed six feet or more off the ground. Trail-cameras placed lower can be right in a deer’s face, making it more likely they will notice the camera, but simply moving your camera up the tree and angling it down, you’ll improve your odds.
Now, some believe it can be more difficult to estimate the age of bucks in photos taken from a high angle because features like belly and necklines are less visible. When age is important, like with a trail-camera survey this time of the year, keep cameras lower but make some effort to conceal it.
Camera Settings
What you chose for the settings on your camera can play a big part in the success of your photos. If the camera is high and out of the deer’s main line of sight, I like to use video mode. However, if in a setup that is more likely to be picked up by deer, in video mode, the IR flash goes off for a longer period of time.
Results
If you’ve figured out a proper set up for your trail-camera, the proof will be in the photos! So keep these simple steps in mind, see what you get, and adjust your setup as you go to continue improving your success.
If any of you would like to share a picture from your own adventures, or a story of your success on the hunt, feel free to reach out to me at [email protected]. God bless and good hunting!

